We’ve all been there: frantically rummaging through kitchen drawers searching for the wine opener, digging through office drawers for that one specific charger, or emptying a craft drawer looking for scissors that should be there. The average person spends 2.5 days per year searching for misplaced items—a staggering waste of time that drawer labels can virtually eliminate. While labeling might seem like a simple aesthetic choice, it’s actually a strategic organizational system that transforms how your brain processes spatial information and retrieves objects.
The right drawer label system does more than identify contents; it creates a visual language for your home or workspace that reduces cognitive load, streamlines daily routines, and brings a sense of calm to cluttered environments. Whether you’re organizing a bustling family kitchen, a precision-driven workshop, or a minimalist office, understanding the nuances of label design, materials, and placement will revolutionize your relationship with storage. Let’s explore the comprehensive framework for implementing a labeling system that truly ends the “where is it?” hunt forever.
Top 10 Drawer Labels
Detailed Product Reviews
1. 60 Pack 1.2" x 4.3" Self Adhesive Label Holders with 60Pcs Paper Label Inserts, Shelf Tag Label Holder Clear Pockets for Bookshelf Mailbox Shelves Storage Bins

Overview: This comprehensive labeling kit provides 60 self-adhesive PVC pockets and 60 matching paper inserts, offering a complete solution for organizing shelves, storage bins, mailboxes, and more. The transparent holders protect labels from wear while making them easily visible and legible from a distance.
What Makes It Stand Out: The combination of durable PVC pockets and removable adhesive sets this apart from basic sticker labels. The 1.2" x 4.3" size accommodates most standard labeling needs, and the included paper inserts mean you’re ready to organize immediately. The adhesive is designed to stick firmly to metal, wood, plastic, and cardboard while remaining removable without leaving residue.
Value for Money: At $8.99 for 60 complete label sets, you’re paying approximately $0.15 per unit. This represents excellent value compared to purchasing holders and inserts separately. The reusability factor—simply swap out paper inserts—extends the lifespan beyond single-use stickers, making it economical for evolving organization systems.
Strengths and Weaknesses: Strengths include exceptional quantity for large projects, versatile surface compatibility, protective pocket design, and clean removal. The PVC material offers clarity and durability. Weaknesses involve temperature sensitivity (can yellow or crack in heat) and potential adhesive failure on heavily textured surfaces. The adhesive may also lose effectiveness after multiple repositionings.
Bottom Line: Ideal for large-scale organizing projects where flexibility and protection matter. Best suited for indoor environments with stable temperatures. A cost-effective choice for home, office, or retail use where labels may need periodic updates.
2. Mr. Pen- Basket Labels Clip On Set, 32 pcs, 30 Removable Bin Labels Clip On with 2 Chalk Markers

Overview: Mr. Pen offers a stylish black clip-on labeling system designed for baskets, bins, and containers. The 32-piece set includes 30 label clips and two white chalk markers, providing immediate out-of-the-box functionality for organizing any space with a modern aesthetic.
What Makes It Stand Out: The clip-on design eliminates adhesive concerns entirely, making these perfect for fabric bins, wire baskets, and containers where sticky labels fail. The high-contrast black clips with white chalk markers create excellent visibility. The erasable chalk surface allows for unlimited label changes without replacing components.
Value for Money: Priced at $8.95, this kit costs roughly $0.30 per clip plus two quality chalk markers. While more expensive per unit than adhesive options, the unlimited reusability justifies the price. The included markers eliminate additional purchases, and the durable clips should last indefinitely with proper care.
Strengths and Weaknesses: Major strengths include adhesive-free application, excellent reusability, stylish appearance, and included markers. The clip mechanism fits most basket rims and bin edges. Weaknesses include limited to clip-able surfaces, potential chalk smudging if not allowed to dry, and the 30-clip count may be insufficient for larger projects. Chalk markers require periodic reapplication.
Bottom Line: Perfect for open storage systems with baskets and bins. The reusable design makes it environmentally friendly and cost-effective long-term. Best for those who frequently reorganize or prefer a clean, modern look without adhesive residue.
3. Clip-On Metal Cabinet and Drawer Labels – Reusable Chalkboard Labels for Kitchen, Bathroom, Dresser Drawers. Durable. Polished Edge. No Residue.

Overview: These premium metal clip-on labels target a specific niche: cabinet doors and drawer fronts. Constructed from durable metal with a modern matte finish, they provide a sophisticated alternative to plastic or adhesive labels for high-traffic kitchen and bathroom organization.
What Makes It Stand Out: The metal construction with polished edges offers unmatched durability and a high-end aesthetic that plastic alternatives cannot match. The clip design attaches directly to cabinet and drawer fronts without adhesives, preventing surface damage on expensive furniture. The erasable chalkboard surface enables infinite relabeling.
Value for Money: At $23.99, these command a premium price point. However, the metal build ensures longevity that disposable or plastic options cannot match. For homeowners investing in kitchen or bathroom organization, the cost per use over years becomes negligible. The damage-free design protects valuable cabinetry, potentially saving money on repairs or refinishing.
Strengths and Weaknesses: Strengths include exceptional durability, premium appearance, secure clip mechanism, and complete surface safety. The versatile application works in kitchens, bathrooms, dressers, and offices. Weaknesses are the high upfront cost, limited to cabinet/drawer edges, potential for metal clips to scratch surfaces if not properly designed, and the small quantity (implied single-digit count) for the price.
Bottom Line: Best suited for permanent organization in homes where aesthetics and cabinet protection are priorities. Justifies its premium price through durability and furniture preservation. Ideal for kitchen and bathroom renovations or high-end organization projects.
4. 60 Pcs Shelf Labels - 3 x 1 Inch Drawer Labels with 60 Pcs White Paper Tags, Plastic Holders, Clear Adhesive for Storage, Bookshelf, Mailbox

Overview: This straightforward labeling solution delivers 60 adhesive-backed clear plastic holders sized at 3" x 1" with matching paper tags. Designed for practical organization of drawers, bookshelves, mailboxes, and storage containers, it prioritizes function over frills.
What Makes It Stand Out: The 3" x 1" dimensions provide a wider, shorter profile compared to standard label holders, offering better visibility for shorter text. The all-in-one package includes both holders and inserts, eliminating separate purchases. The clear plastic construction allows for quick label identification while protecting paper tags from moisture and handling.
Value for Money: At $8.99 for 60 complete units, the cost per label is approximately $0.15, positioning this as a budget-friendly bulk option. This pricing matches competitor offerings while providing a slightly different size profile. For large projects requiring uniform labeling, the quantity and price point offer solid value, though longevity may not match premium alternatives.
Strengths and Weaknesses: Strengths include excellent quantity for the price, versatile size suitable for various applications, protective clear covering, and immediate usability. The adhesive backing enables quick installation. Weaknesses involve potential adhesive residue upon removal, plastic that may yellow over time, and lack of premium features like repositionability. The narrow width limits text space compared to larger options.
Bottom Line: A practical choice for budget-conscious organizers needing many labels quickly. Works best for semi-permanent installations where labels won’t require frequent changes. Suitable for garage, office, or classroom organization where absolute premium quality isn’t essential.
5. Avery Multi-Use Removable Labels, 1" x 3", White, Non-Printable, 72 Blank Labels Total (6728)

Overview: Avery’s entry-level removable labels provide a no-frills solution for temporary labeling needs. These 1" x 3" white labels feature a removable adhesive that sticks to smooth surfaces but peels away cleanly, making them ideal for short-term organization projects.
What Makes It Stand Out: The Avery brand name ensures reliable adhesive quality and consistent performance. The removable adhesive formulation prevents surface damage, a key advantage over permanent labels. At 1" x 3", they match standard label dimensions for compatibility with many storage systems. The handwrite-only design simplifies use without requiring printers or special equipment.
Value for Money: At $1.42 for 72 labels, this is the most economical option at roughly $0.02 per label. This price point makes them essentially disposable, perfect for one-time projects like moving, temporary storage, or event organization. The value proposition centers on convenience and low commitment rather than longevity.
Strengths and Weaknesses: Strengths include unbeatable price, trusted brand quality, clean removal, and simple application. The labels adhere well to paper, plastic, wood, glass, and metal. Weaknesses are the lack of protective covering (vulnerable to moisture and wear), non-reusable design, and limited to handwriting. The thin paper construction tears easily, and the white background shows dirt quickly.
Bottom Line: Best for temporary situations where cost is the primary concern. Ideal for moving boxes, short-term storage, or event labeling. Not suitable for long-term organization where durability matters. The Avery quality ensures they’ll perform as expected for disposable label needs.
6. ONUPGO Chalkboard Labels-180pcs Waterproof Reusable Blackboard Stickers with 1 Liquid Chalk Marker for Mason Jars, Parties Decoration, Craft Rooms, Weddings, Storage, Organize Your Home & Kitchen
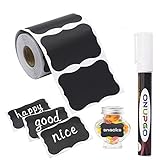
Overview: The ONUPGO Chalkboard Labels offer a comprehensive solution for home organization with 180 waterproof vinyl stickers and a liquid chalk marker. Designed for versatility, these matte black labels adhere to mason jars, spice containers, storage bins, and office supplies, providing a reusable labeling system for pantries, craft rooms, and events.
What Makes It Stand Out: This set’s exceptional value lies in its sheer quantity and complete package. The 180 labels measure 2" x 2.95" and can be cut into custom shapes, while the waterproof vinyl construction ensures durability in refrigerators and humid environments. The included non-toxic liquid chalk marker delivers quick-drying, smudge-resistant writing that wipes clean with a damp cloth, allowing endless re-labeling without residue.
Value for Money: At $8.49 for 180 labels plus a marker, this represents outstanding value—costing less than 5 cents per label. Comparable sets often charge extra for the marker or provide fewer pieces, making this an economical choice for large-scale organization projects.
Strengths and Weaknesses: Strengths include impressive quantity, true waterproof performance, smooth writing surface, and excellent adhesion on most clean surfaces. The reusable design reduces waste and saves money long-term. Weaknesses involve potential adhesive degradation after multiple repositionings, and the vinyl material may not suit those seeking a more premium aesthetic. The marker requires proper priming (shaking and pumping) which some users may find inconvenient.
Bottom Line: This comprehensive set delivers exceptional bang for your buck, making it ideal for budget-conscious organizers tackling pantries, craft supplies, or party decorations. While not the most luxurious option, its functionality and quantity make it a practical choice for most household labeling needs.
7. Clip-On Metal Cabinet and Drawer Labels – Reusable Chalkboard Labels for Kitchen, Bathroom, Dresser Drawers. Durable. Polished Edge. No Residue.

Overview: These Clip-On Metal Cabinet and Drawer Labels provide a premium, non-adhesive labeling solution for furniture and storage units. Crafted from durable metal with a modern matte finish, these reusable tags clip directly onto cabinet doors and drawer fronts, offering a sophisticated alternative to traditional stickers.
What Makes It Stand Out: The standout feature is the innovative clip-on design that eliminates adhesives entirely, preventing damage and residue on expensive cabinetry. The metal construction ensures longevity while the polished edges provide a refined, professional appearance. These labels work with chalk markers, allowing for easy erasing and re-labeling as storage needs evolve.
Value for Money: At $23.99, these command a premium price but justify it through durable metal construction and infinite reusability. Unlike adhesive labels that require replacement, this one-time investment serves indefinitely, making it cost-effective for homeowners and renters who prioritize furniture preservation.
Strengths and Weaknesses: Strengths include exceptional durability, zero adhesive damage, sleek aesthetic appeal, and secure grip on most cabinet edges. They’re perfect for rental properties where permanent labels are prohibited. Weaknesses include the higher upfront cost, limited compatibility with curved or unusually thick drawer fronts, and the requirement for chalk markers (not included). The metal design may also scratch delicate surfaces if not handled carefully.
Bottom Line: These metal clip-on labels are perfect for design-conscious homeowners and renters seeking a damage-free, reusable labeling system. While pricier than adhesive options, their durability and furniture-friendly design make them a worthwhile investment for kitchen, bathroom, or office organization where preserving surfaces matters.
8. 44 Pack Labels for Storage Bins, 3×5 Inches Index Card Holder Organizer, Clear Adhesive Pockets, Plastic Label Holders for Tote Library Card Bins Box Drawer Classroom Organization

Overview: This 44-pack of clear adhesive pockets provides a practical labeling system specifically designed for 3×5 inch index cards. These waterproof, dustproof label holders feature a top-open design with semicircle cutouts, making them ideal for storage bins, file cabinets, drawers, and classroom organization.
What Makes It Stand Out: The precision sizing for standard index cards sets this apart from generic label holders. The crystal-clear PVC material offers excellent visibility while the strong adhesive backing ensures long-lasting attachment to metal, wood, glass, and paper surfaces. The thoughtful semicircle cutout allows easy card removal without damaging the holder.
Value for Money: At $7.99 for 44 pockets, this delivers exceptional value at approximately 18 cents per holder. Competing products often cost more while providing fewer pieces, making this an economical solution for large-scale organizational projects in offices, classrooms, or home storage areas.
Strengths and Weaknesses: Strengths include perfect 3×5 inch compatibility, strong adhesive performance, waterproof protection, and easy card insertion/removal. The clear design enables quick content identification without opening containers. Weaknesses include permanent adhesive that may damage surfaces upon removal or leave residue. The plastic material may yellow with prolonged sun exposure, and the specific sizing limits flexibility for other card dimensions.
Bottom Line: These index card holders excel for anyone using 3×5 cards for organization. They’re perfect for teachers, office managers, or home organizers seeking a uniform labeling system. While adhesive permanence requires careful placement planning, the clarity, quantity, and value make them a smart purchase for structured storage solutions.
9. Owl Focus Label Holders Adhesive Shelf Tag Clear Shelf Tag Index Card Pockets Plastic Drawers File Cabinet Storage Bins Label Holder for Supermarket Bookshelf Mailbox Business Kitchen,Pack of 60

Overview: The Owl Focus Label Holders offer a comprehensive 60-pack solution for transparent adhesive labeling. Each pack includes 60 clear plastic pockets and 60 matching cardstock papers, creating a ready-to-use system for organizing office files, storage bins, binders, and fabric boxes.
What Makes It Stand Out: This kit’s inclusion of perfectly sized cardstock eliminates the need to source separate paper, providing immediate usability. The transparent high-quality material ensures excellent label visibility while promising clean removal without residue. The versatile design accommodates various organizational needs from supermarket shelves to home kitchens.
Value for Money: Priced at just $7.59 for 60 complete label sets, this represents remarkable value at roughly 13 cents per unit. The bundled cardstock adds convenience that many competitors lack, saving time and additional expense while delivering professional-looking organization.
Strengths and Weaknesses: Strengths include exceptional affordability, included cardstock, residue-free removal claims, and versatile application across multiple surfaces. The strong adhesive backing ensures secure placement. Weaknesses involve the basic plastic construction that may lack durability for heavy-duty use, and the cardstock paper quality may not withstand moisture or frequent handling. The adhesive strength, while secure, could potentially damage delicate surfaces upon removal despite residue-free claims.
Bottom Line: This budget-friendly label holder kit is ideal for light to medium organizational tasks in offices, classrooms, or home storage. While not built for industrial environments, the included cardstock and excellent price point make it perfect for anyone seeking a quick, affordable labeling solution with minimal fuss.
10. 20PCS Basket Labels Clip On, Removable Plastic Bin for Storage Bins, Pantry Organization and Storage Hanging Tags for Basket Cube Box, in Pink

Overview: These 20 pink clip-on basket labels provide a colorful, reusable tagging solution for fabric, wire, and wicker baskets. Made from durable PVC with a matte writing surface, each tag measures 3.5" wide with a 1.2 cm clip gap, accompanied by two black markers for immediate use.
What Makes It Stand Out: The vibrant pink color adds a decorative element while the clip-on design eliminates adhesive concerns entirely. The dual-sided construction features a matte front for superior writing performance and a smooth back, ensuring durability and aesthetic appeal. The washable surface allows infinite re-labeling, making these truly reusable.
Value for Money: At $12.99 for 20 labels plus markers, this mid-range option costs about 65 cents per label. While pricier than adhesive alternatives, the reusability and included markers provide long-term value, especially for frequently changing storage contents in pantries or kids’ playrooms.
Strengths and Weaknesses: Strengths include damage-free clip application, included markers, washable/reusable surface, and versatile compatibility with most basket types. The pink color offers visual organization cues. Weaknesses include limited quantity for the price, color preference limitations (pink only), and potential clip size incompatibility with very thick or thin basket rims. The PVC material, while durable, may not suit all aesthetic preferences.
Bottom Line: These clip-on labels excel for organizing colorful spaces like children’s rooms, craft areas, or playful pantries. They’re perfect for those prioritizing reusability and surface protection over quantity. While the pink hue limits universal appeal, the functionality and eco-friendly reusable design make them worthwhile for targeted organizational projects.
Why Drawer Labels Transform More Than Just Organization
The Hidden Cost of Disorganization
Every moment spent searching represents more than lost time—it’s mental energy drained from more important tasks. Disorganization creates decision fatigue as your brain constantly processes visual clutter and attempts to create mental maps of where things might be. This cognitive overhead accumulates throughout the day, leaving you feeling exhausted before you’ve even tackled your actual to-do list. Drawer labels act as external memory aids, offloading this mental burden and freeing up brainpower for creative thinking and problem-solving.
How Labels Create Mental Clarity
When you implement a consistent labeling system, you’re essentially creating a user interface for your physical space. Just as clear navigation on a website reduces bounce rates, clear drawer labels reduce “bounce behavior”—that frustrating cycle of opening and closing drawers in search of one item. Labels provide immediate visual feedback, activating pattern recognition in your brain and allowing you to locate items through peripheral vision without even reading the text directly. This subconscious processing is what makes well-designed label systems feel almost magical in their efficiency.
Understanding the Psychology Behind Visual Organization
Cognitive Load Reduction
Your working memory can only hold about four pieces of information at once. When you’re trying to remember which drawer holds the baking supplies versus the cooking utensils, you’re using precious cognitive resources that could be allocated elsewhere. Labels externalize this information, reducing your intrinsic cognitive load and allowing you to operate on autopilot for routine tasks. This is particularly powerful in high-stress environments like commercial kitchens or busy family homes where mental bandwidth is already stretched thin.
The Power of Visual Cues
The human brain processes images 60,000 times faster than text, which is why the most effective label systems combine textual information with visual elements. Color, shape, and iconography create multiple pathways for recognition, ensuring that even when you’re tired or distracted, your brain can quickly identify the correct drawer. This multimodal approach is especially beneficial for households with children, elderly members, or neurodivergent individuals who may process visual information differently than text alone.
The Core Types of Drawer Label Systems
Adhesive Stickers and Decals
The most common and accessible option, adhesive labels range from basic paper stickers to sophisticated vinyl decals. The key differentiator lies in adhesive quality and removability. High-quality systems use pressure-sensitive adhesives that create a strong bond without bubbling or peeling, yet can be removed without leaving residue when properly applied. Look for labels with air-release channels that allow trapped air to escape during application, preventing those frustrating bubbles that compromise both aesthetics and durability.
Magnetic and Clip-On Labels
For metal drawer fronts or systems where flexibility is paramount, magnetic labels offer unparalleled adaptability. These typically consist of a magnetic base with interchangeable inserts, allowing you to update labels as contents evolve. Clip-on systems work similarly for non-metallic surfaces, using spring-loaded or slide-in mechanisms that grip drawer edges. Both options excel in rental properties, workshops where inventory frequently changes, or households in transition, as they require zero surface modification and cause no damage upon removal.
Sliding Window and Insert Systems
These premium solutions feature a transparent sleeve or window that protects a paper insert, combining the customization of DIY labels with the durability of commercial systems. The sliding mechanism allows for quick changes without peeling or scraping, making them ideal for offices, craft rooms, or any environment where drawer contents shift seasonally. The protective layer also shields labels from moisture, oils, and UV fading, significantly extending their lifespan in challenging environments like kitchens or garages.
Material Matters: Choosing the Right Substrate for Your Labels
Paper-Based Options
Standard paper labels work beautifully for dry, low-traffic environments like bedroom dressers or linen closets. However, not all papers are created equal. Look for acid-free, lignin-free options that resist yellowing and brittleness over time. For a more sophisticated aesthetic, consider textured papers like linen or laid finishes that add tactile dimension and hide fingerprints. Thermal paper should be avoided for long-term applications as it darkens and becomes illegible when exposed to heat or friction.
Synthetic and Waterproof Materials
For kitchens, bathrooms, and workshops, synthetic labels made from polyester, polypropylene, or vinyl offer superior durability. These materials resist moisture, oils, chemicals, and temperature fluctuations that would destroy paper labels. Matte-finish synthetics reduce glare under bright lighting, while gloss finishes create a premium look but can reflect light and become hard to read from certain angles. For extreme conditions, look for labels with UV-resistant coatings that prevent fading in sunlit areas.
Eco-Friendly Alternatives
Sustainability-conscious organizers now have excellent options including bamboo-based labels, recycled plastic composites, and even seed paper that can be planted after use. These materials often feature natural textures and subtle color variations that add organic warmth to your space. While typically more expensive, they align with zero-waste lifestyles and often come with compostable or recyclable adhesive backings. The trade-off is usually reduced moisture resistance, making them best suited for dry environments.
Adhesive Options: Balancing Stick and Removability
Permanent vs. Semi-Permanent Solutions
Permanent adhesives create a bond that strengthens over time, making them ideal for long-term storage solutions where contents rarely change. These typically require solvents for removal and may damage surfaces if removed improperly. Semi-permanent adhesives, conversely, use microsphere technology that creates a strong initial tack but allows clean removal within a specific time window—usually 6-12 months. This makes them perfect for growing families, evolving businesses, or anyone who reorganizes seasonally.
Damage-Free Alternatives for Renters
Command-style adhesive strips and static-cling vinyl offer zero-damage solutions for rental properties. These systems use removable adhesives that stretch when pulled, releasing cleanly from surfaces without residue or paint damage. Static-cling labels adhere through suction rather than glue, working best on smooth, non-porous surfaces like glass or high-gloss laminate. While less durable in high-humidity environments, they can be repositioned infinitely and leave zero trace—perfect for temporary living situations or indecisive organizers.
Font and Typography Best Practices for Maximum Legibility
Size Recommendations by Distance
Typography hierarchy is crucial for quick scanning. For drawers viewed from 3-6 feet away (typical kitchen or office distance), use a minimum of 24-point font for primary text and 18-point for secondary information. Labels viewed from greater distances, like garage storage, require 36-point or larger. The golden ratio for label design suggests making your category name 1.6 times larger than any descriptive text below it, creating natural visual hierarchy that guides the eye.
Font Styles That Enhance Recognition
Sans-serif fonts like Helvetica, Futura, or Arial offer the best legibility at a glance due to their clean lines and consistent stroke weights. Avoid decorative scripts or condensed fonts that reduce character distinguishability. For a modern twist, consider rounded sans-serifs that feel friendly while maintaining clarity. Font weight matters too—medium (500) to semi-bold (600) weights provide optimal contrast without overwhelming small labels. Letter spacing (kerning) should be slightly increased for small text to prevent characters from visually merging together.
Color Coding Strategies That Actually Work
The 60-30-10 Rule for Label Systems
Borrowed from interior design, this rule creates visual harmony: use 60% neutral base colors (white, cream, light gray), 30% category-specific colors, and 10% accent colors for priority items. This prevents the rainbow effect that can make label systems feel chaotic. For example, in a kitchen, all food-related labels might use a sage green (30%), while the “First Aid” drawer gets a red accent (10%) against a white background (60%). This creates enough color differentiation to be useful without overwhelming the visual field.
Color Associations by Category
Leverage existing mental associations: blue for office supplies (like corporate blue), green for gardening or food items, red for urgent or dangerous items, yellow for tools or caution items. These color shortcuts tap into cultural conditioning, reducing the cognitive processing time needed to identify categories. For households with children, consider using the same color-coding system as their school supplies to create consistency across environments. Remember that approximately 8% of men and 0.5% of women have color vision deficiency, so never rely on color alone—always pair it with text or icons.
Size and Placement: The Science of Visual Scanning
The Golden Zone for Label Positioning
Eye-tracking studies reveal that people naturally scan drawer fronts in an F-pattern, starting at the top-left corner. Place labels within the upper third of drawer fronts for optimal visibility, approximately 2-4 inches from the top edge. For stacked drawers, stagger labels slightly left to right as you move down, creating a diagonal line that prevents visual overlap when scanning the entire column. This positioning aligns with natural eye movement patterns, reducing search time by up to 40% compared to centered or bottom-placed labels.
Scaling Labels for Drawer Fronts
Proportion matters. Labels should occupy 15-25% of the drawer front’s width—large enough to be easily read but small enough to allow for visual breathing room. For standard 12-inch wide drawers, this means labels between 1.8-3 inches wide. Height should be proportional, typically 0.5-1 inch tall depending on text requirements. Oversized labels create visual clutter and can make spaces feel smaller, while undersized labels require conscious focus to read, defeating the purpose of quick identification.
Room-by-Room Labeling Strategies
Kitchen and Pantry Applications
Kitchens demand moisture-resistant materials and categorization systems that reflect cooking workflows. Group labels by function rather than just item type: “Prep Tools,” “Cooking Utensils,” “Baking Supplies,” “Cleaning.” Consider adding sub-labels for expiration management—small date fields on labels for drawers holding spices or dry goods help track freshness. For deep drawers, use wrap-around labels that are visible from multiple angles, or consider double-labeling with one on the front and one inside the drawer lip.
Home Office and Craft Room Solutions
These spaces benefit from granular categorization and frequent updates. Use sliding window systems for supply drawers that change with projects. Implement a two-tier system: broad categories on drawer fronts (“Paper,” “Adhesives,” “Tools”) and detailed inventories inside the drawer using smaller labels or printed lists protected in clear sleeves. For shared offices, consider adding user initials to labels to prevent cross-contamination of supplies and maintain individual accountability.
Garage and Workshop Organization
Extreme temperatures, dust, and oil require heavy-duty solutions. Opt for anodized aluminum or thick vinyl labels with industrial-strength adhesives. Use icons heavily here—a hammer icon for tools, a spray can for paints—since garages are often scanned quickly from a distance. Reflective materials or high-contrast color combinations (black on yellow, white on red) improve visibility in dim lighting. For metal tool chests, magnetic label systems are invaluable, allowing you to reorganize as tool collections grow.
Bedroom and Closet Systems
Bedroom labeling calls for softer aesthetics that blend with décor. Fabric labels with iron-on or sew-in options work beautifully for dresser drawers, while minimalist adhesive labels in muted tones maintain serenity. Consider using labels on the inside of drawer lips for a clean exterior look that still provides organization. For children’s rooms, picture labels paired with words support early literacy while making cleanup intuitive and fun.
Customization vs. Pre-Made: Making the Right Choice
When to Invest in Custom Solutions
Custom labels justify their higher cost when you have unique dimensions, specialized terminology, or specific aesthetic requirements. If your drawers are non-standard sizes, custom labels ensure proper proportions. Businesses with proprietary product names or families with specific categorization systems benefit from custom text that reflects their exact needs. Custom also makes sense for permanent installations in dream kitchens or built-in cabinetry where you’ll live with the labels for decades.
Leveraging Pre-Made Template Libraries
Modern pre-made systems offer surprising flexibility with extensive template libraries covering thousands of common items. These are ideal for standard organizing projects where you need speed and consistency. Many systems now offer mix-and-match components—choose from dozens of fonts, colors, and icons to create semi-custom looks without the price tag. The key is selecting a system with robust template software that allows you to add custom text to pre-designed layouts, giving you the best of both worlds.
DIY Label Creation: Tools and Techniques
Hand-Lettering for a Personal Touch
Hand-lettered labels using paint pens or permanent markers on tag stock create heirloom-quality organization with undeniable charm. Use a lightbox to trace guidelines for consistent sizing, and seal finished labels with clear acrylic spray for durability. This approach shines in craft rooms, vintage-inspired kitchens, or anywhere you want organization to feel artisanal rather than industrial. The investment is time rather than money, but the result is completely unique and can become a family tradition.
Printing Professional-Looking Labels at Home
Modern inkjet and laser printers can produce near-commercial quality when paired with the right materials. Use high-resolution label sheets (at least 300 DPI) and set your printer to “photo” or “best” quality mode. For waterproof results, print on synthetic sheets and apply a clear laminate overlay. Thermal transfer printers offer another level of durability, creating labels that resist smudging and fading for years. The secret is in the finishing—use a corner rounder to eliminate sharp edges that peel, and apply labels with a squeegee tool to ensure bubble-free adhesion.
Digital Integration: Smart Labels for Modern Homes
QR Code Labels for Inventory Management
QR code labels bridge physical and digital organization. Scanning a drawer label can pull up a complete inventory spreadsheet, shopping list, or instructional video. This is revolutionary for deep storage, holiday decoration organization, or pantry management. Generate QR codes using free online tools, print them on durable labels, and link to cloud-based documents you can update in real-time. The system requires initial setup but pays dividends in large households or small businesses where tracking inventory across multiple locations is crucial.
NFC-Enabled Options for Tech-Savvy Organizers
Near Field Communication (NFC) tags take smart labels further, allowing you to update information without reprinting. A tap with your smartphone can log when you last accessed items, set reminders for replenishment, or even trigger smart home routines. While currently more expensive, NFC labels represent the future of interactive organization. They’re particularly valuable for wine collections, tool inventories, or medication management where tracking usage patterns provides actionable insights.
Maintenance and Updating Your Label System
Seasonal Review Protocols
Even the best label systems require maintenance. Implement a quarterly review where you check for peeling, fading, or outdated information. The change of seasons is a natural trigger—when you switch out clothes or holiday items, take 15 minutes to audit your labels. Keep a “label log” document noting what you’ve labeled and when, so you can quickly identify which labels are approaching their lifespan. This proactive approach prevents the gradual decay that makes label systems ineffective.
Cleaning and Refreshing Techniques
Clean labeled surfaces with a damp microfiber cloth—avoid harsh chemicals that can break down adhesives or fade inks. For labels that have lost adhesion, a thin layer of repositionable glue stick can extend their life. When labels become outdated, remove them using a hairdryer to warm the adhesive, then clean residual stickiness with rubbing alcohol or Goo Gone. Always test cleaning products on an inconspicuous area first to ensure they won’t damage your drawer finish.
Common Labeling Mistakes That Sabotage Organization
Over-Labeling and Label Fatigue
The biggest mistake is labeling every single drawer, including those holding obvious items. This creates visual noise that makes important labels harder to find. Reserve labels for drawers with ambiguous contents or shared spaces. A good rule: if you can tell what’s inside by the drawer’s location or obvious contents, it doesn’t need a label. Your underwear drawer probably doesn’t need a label; your “Winter Accessories” drawer definitely does.
Inconsistent Naming Conventions
Using “Kitchen Towels” on one label and “Tea Towels” on another creates confusion. Establish a master vocabulary list before you start labeling and stick to it. Use the most common term for items, not the most technically correct one. “Screwdrivers” beats “Flathead and Phillips Drivers” for everyday use. Consistency extends to formatting—decide on title case vs. sentence case, abbreviations, and whether to include articles like “the” or “a,” then apply these rules universally.
Future-Proofing Your Label System
Designing for Flexibility
Build evolution into your system from day one. Leave 20% of your labels blank or use generic terms like “Miscellaneous Projects” that can shift meaning over time. Use label holders rather than direct application when possible, allowing you to swap inserts without residue. Choose label materials and adhesives rated for 5+ years of removability, even if you plan to keep them permanently—you’ll thank yourself when you inevitably reorganize.
Scalability Considerations
Design your system as if you’ll eventually label every storage surface in your home. Choose a brand or system that offers expansion packs, compatible products for shelves and bins, and consistent sizing across their product line. This creates visual continuity as your organization journey grows. Document your font choices, color codes, and sizing in a “style guide” you keep with your household files, ensuring that new labels you add years from now match perfectly with existing ones.
Frequently Asked Questions
How do I choose between adhesive and non-adhesive label systems?
Consider your timeline and surface. Adhesive labels offer a clean, permanent look ideal for long-term installations on stable surfaces. Non-adhesive systems (magnetic, clip-on) excel in rental properties, frequently changing inventories, or on valuable furniture where residue is a concern. For most homes, a hybrid approach works best—adhesive labels for permanent kitchen drawers, magnetic for craft rooms or garages.
What’s the best way to label drawers for children who can’t read yet?
Combine simple line drawings or silhouettes with large, clear text. Use picture labels on the outside for immediate recognition and text inside the drawer lip to support literacy development. Choose images that are universally recognizable rather than stylized—stick figures work better than abstract icons. Involve children in drawing or selecting images to increase buy-in and make cleanup a game rather than a chore.
How do I remove old labels without damaging wood finishes?
Warm the label with a hairdryer on medium heat for 30-60 seconds to soften the adhesive. Peel slowly at a 180-degree angle (flat against the surface) rather than pulling upward. For residue, apply a small amount of cooking oil or mayonnaise, let it sit for 10 minutes, then gently scrape with a plastic card. Clean with a mixture of mild dish soap and water. Always test any method on a hidden spot first.
Can I write on waterproof labels after printing?
Most waterproof synthetic labels accept ballpoint pen and permanent marker, but test first. Use oil-based paint pens for the best adhesion and smudge resistance. Avoid water-based markers that bead up on non-porous surfaces. For labels you plan to write on, choose matte finishes over glossy, as they provide better “tooth” for ink to grip. Some premium labels feature a special writable coating specifically designed for this purpose.
How often should I update my drawer labels?
Review labels seasonally or whenever you notice yourself hesitating before opening a drawer. If you pause to remember what’s inside, the label has failed and needs updating. In practice, high-use areas like kitchens may need annual refreshes due to wear, while bedroom labels can last 3-5 years. Set a calendar reminder for a “label audit” every six months to catch fading or peeling before it becomes a problem.
What’s the ideal label size for deep drawers versus shallow drawers?
Deep drawers (over 8 inches) benefit from larger labels (3-4 inches wide) placed near the top edge, potentially with secondary labels on the inside lip visible when opened. Shallow drawers (under 4 inches) need smaller labels (1.5-2 inches) to avoid overwhelming the front. The key is maintaining that 15-25% width proportion regardless of drawer size. For very deep drawers, consider wrap-around labels that extend onto the top edge for visibility from above.
Are there labeling systems that work on fabric drawers?
Yes! Fabric drawers require flexible solutions that move with the material. Iron-on labels work beautifully for canvas or cotton blends—just ensure the fabric can withstand the heat setting. For synthetic fabrics, sew-in label tapes or clip-on tags designed for hanging files adapt perfectly. Adhesive fabric tapes with strong but flexible glue also work, though they may eventually peel with repeated handling. Avoid stiff materials that crack when the fabric flexes.
How can I make my labels look professional, not homemade?
Consistency is key. Use a template to ensure identical sizing and alignment across all labels. Choose a professional font like Helvetica or Gotham and limit yourself to one or two colors maximum. Invest in a corner rounder tool to eliminate sharp edges that scream “DIY.” Apply labels with a squeegee or credit card to remove every bubble. Finally, step back and ensure all labels are at the exact same height—misalignment is the fastest way to make a system look amateur.
What’s the best labeling approach for a minimalist aesthetic?
Opt for tone-on-tone labeling: white labels on white drawers, or light gray on dark gray. Use the smallest font size that remains legible (typically 18-point) and eliminate all decorative elements. Place labels on the inside of drawer lips so they’re hidden when closed but visible when in use. Consider engraving or wood-burning for a permanent, integrated look. The goal is making labels disappear until needed, maintaining clean sightlines while preserving functionality.
Can drawer labels increase my home’s resale value?
While labels alone won’t drive up price, a well-organized home photographs better and creates a powerful impression during showings. Built-in organization systems signal that a home has been meticulously maintained. If selling, use neutral, professional-looking labels and avoid overly personal or quirky text. Consider removable systems so buyers can envision their own organization. In luxury markets, integrated labeling systems in walk-in pantries or custom closets can be a subtle value-add that distinguishes your property from comparable listings.